Your Galaxy S4 mini does not charge? A new charging socket can help. So you your smartphone breathed a new life. Experienced screwdriver can also use the image guide.
Step 1 - Remove the screws

Here you have to remove 10 screws.
The screws are no different lengths - you can put all the screws in a heap.
ATTENTION: The Last screw is located to the right of the camera under a seal.
Step 2 - Remove frame

Now you have to separate the frame from the display.
Ride this with a thin metal or plastic tool between the frame and display and click the frame from the holder.
CAUTION: Do not press too hard, otherwise the frame can break.
Step 3 - Remove the flex cable

There are 3 flex cable, which you must solve her to remove the USB board.
CAUTION: Always remove flex cable with a plastic tool. Metal can damage the connectors.
Step 4 - Remove the charging socket

Now you can remove the charging socket.
For this purpose, drive carefully with a thin flat head screwdriver or better a plastic tool under the board and lift slowly.
Do not forget also the micro must be removed from the frame.
CAUTION: Before lifting the board you have to lift slightly.
Step 5 - Install the charging socket again

Install new charging socket again.
Remember to rebuild the rubber cover from the micro with.
When installing the motherboard can easily lift up and take care of the flex cable.
Step 6 - Flex Cable reconnect
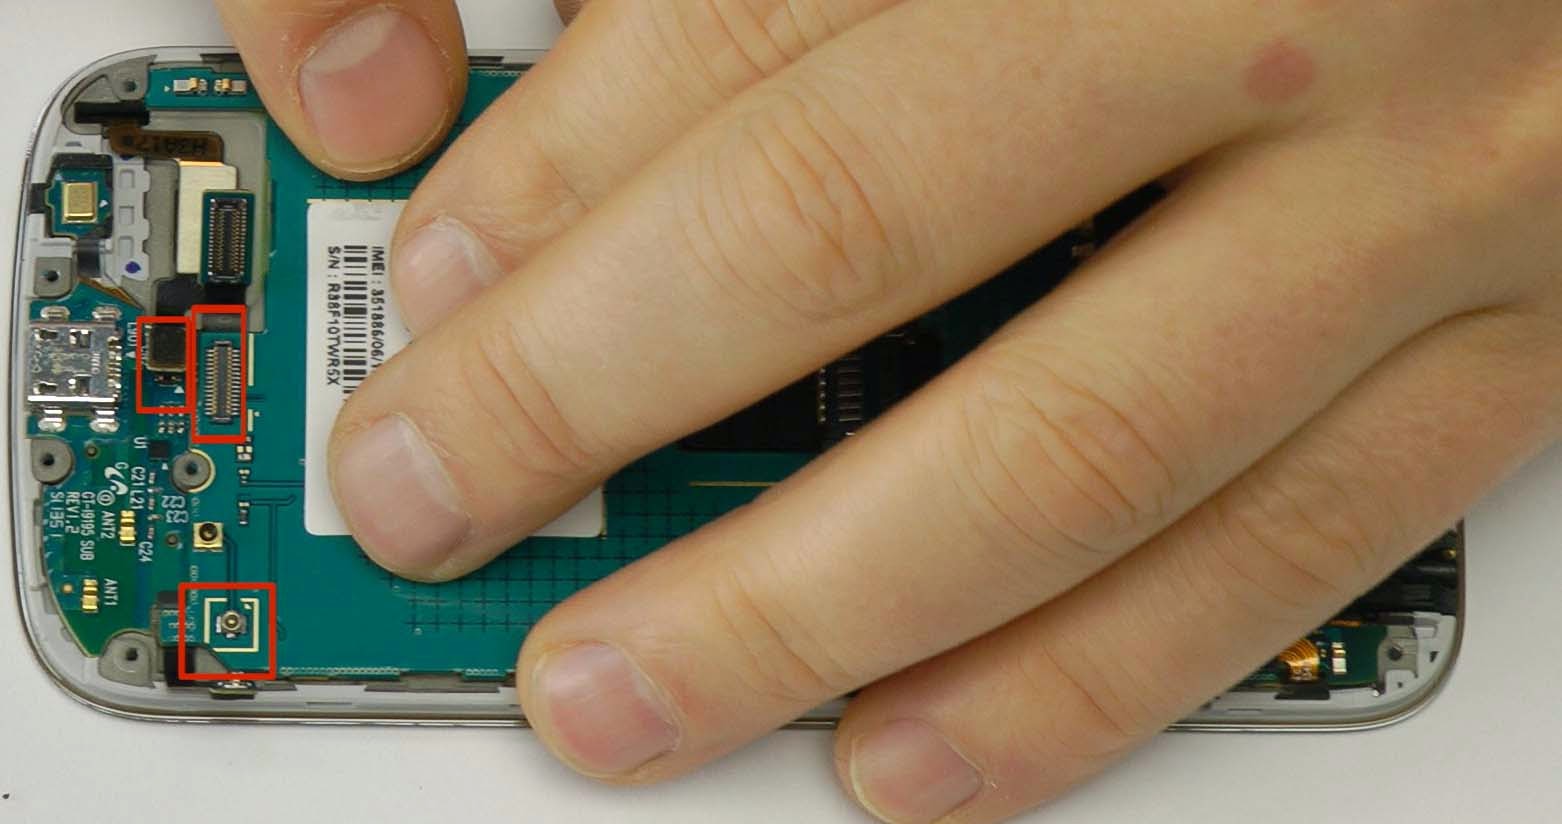
Now you can flex cable connect again.
Two on the USB port and one for the antenna terminal.
Step 7 - Setting click on it again

One of the simple steps: frame again click on it.
Step 8 - Turn the screws purely

Still screw in the screws 10 to the end.
CAUTION: Only hand tighten hard! The cordless screwdriver has not lost here.
Battery purely lid on: DONE!


-latest-pictures.jpg)

